PrototypingSetting up your prototype
Rapidly create HTML prototypes of internal Home Office services.
Before you start
You'll need:
- Node.js - version 12.x.x or higher
- GitHub and Heroku accounts
- Terminal - an application to install, start and stop a prototype. Using a terminal is sometimes called ‘using the command line’.
Step 1. Set up your GitHub repository
This is where your prototype code will be stored.
Log into your GitHub account and create a new blank repository. To give an example, we'll name the repository review-licence-applications.
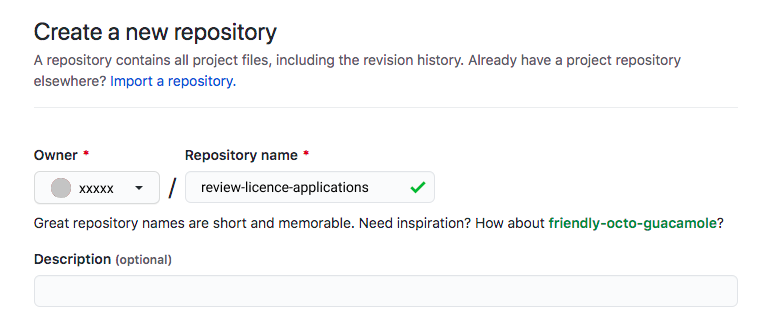
We'll connect this blank repository with the prototype you'll create in the next step.
Step 2. Create a new prototype
Run the prototype generator in terminal
Open terminal and enter these commands:
mkdir review-licence-applications
cd review-licence-applications

git init

git remote add origin git@github.com:YOUR_GITHUB_NAME/review-licence-applications.git
npm init @hods prototype
This does two things: it will create your local repository and link it with the remote GitHub repository you set up in Step 1. The last line will generate your new prototype.
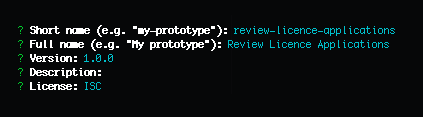
Answer the interactive prompts
The prototype generator will ask you some questions before generating the prototype. Accept the default prompts by simply pressing the 'return' key in terminal.
Pull down the dependencies
After the prototype has been generated, you'll need to pull down the dependencies to make your prototype work. Do this by running:
npm installCommit and push your new prototype to GitHub
Once installation is complete, you can push your prototype to GitHub by entering these commands:
git add .
git commit -m"initial commit"

git branch -M main

git push -u origin main
View the prototype locally
In terminal, enter:
npm run devWhen your terminal returns a message that says:
No issues found.You can view the prototype by opening http://localhost:8080/ in your web browser. This will help you track changes locally as you build your prototype.
Step 3. Deploy your prototype
One of the ways you can deploy, or publish and share your prototype with others, is through Heroku.
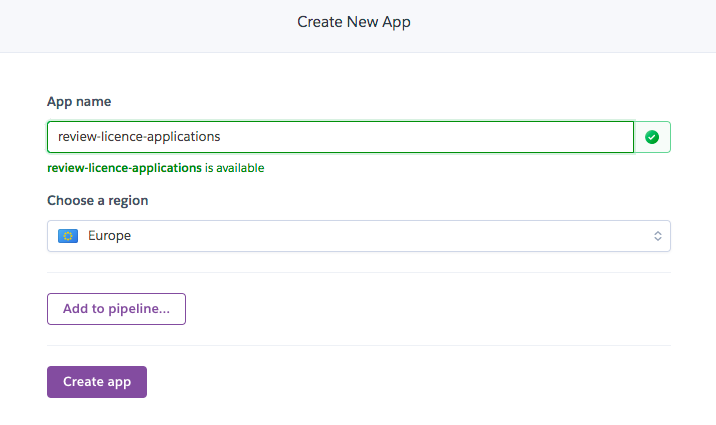
Create an app on Heroku
- Log into your Heroku account
- Click on New and select Create new app
- A prototype deployed on Heroku is called an ‘app’. Type in an app name for your prototype and choose Europe as your region. Click Create app
Run the deployment generator in terminal
In terminal, run the command:
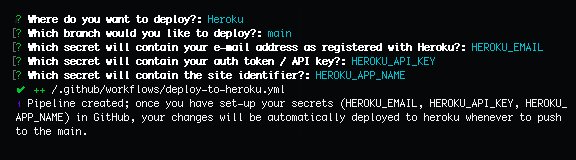
npm run create:deploymentAnswer the interactive prompts
The deployment generator will ask you some questions.
- Hit the 'return' key to select Heroku as your deployment option
- Name your branch main
- Hit the 'return' key to accept the other prompts called 'secrets' asking about your email address, API key and app name
Setting up secrets in GitHub
In your GitHub Settings, select Secrets on the left hand side menu. Click the button New repository secret. This is where you'll be entering the secrets you accepted in your deployment generator.
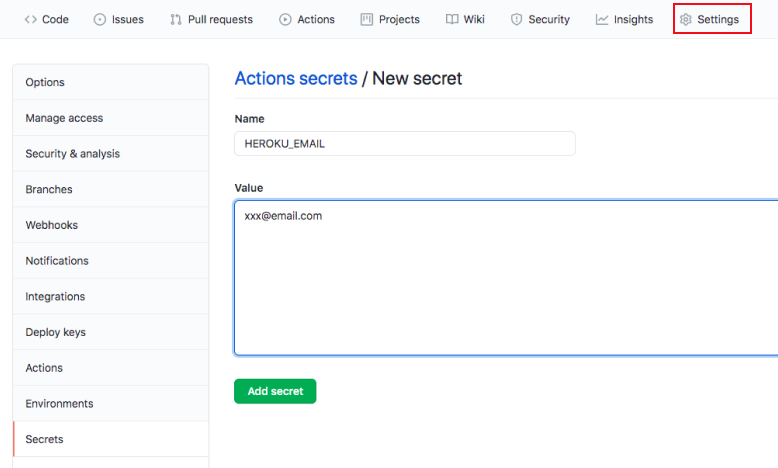
Each secret is made up of a name and value. Enter the names as displayed below with the relevant values.
| Name | Value |
|---|---|
| HEROKU_EMAIL | This will be your Heroku email address |
| HEROKU_APP_NAME | This will be the app name for your prototype; for example, review-licence-applications |
| HEROKU_API_KEY | You can find this by going into your Account settings page in Heroku. Find the section on API Key and click Reveal. |
Push your new deployment on Heroku
In terminal, run these commands:
git add .
git commit -m"add deployment pipeline"

git push
This will build your prototype in Heroku and may take a few minutes. Once that is done, click on the Open app tab in Heroku to view your prototype. It will have a url like review-licence-applications.herokuapp.com which you can share with others.
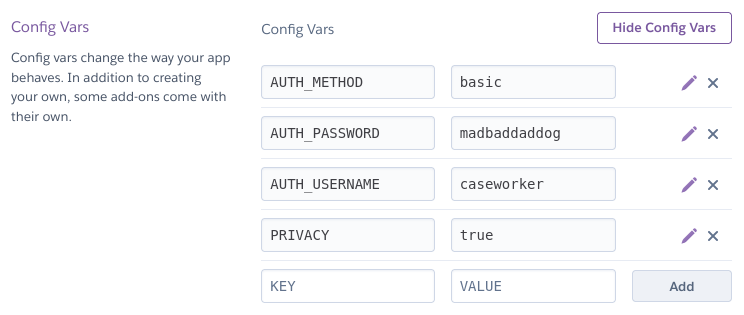
Set a username and password
After you’ve completed the last step to deploy your application, you must protect your prototype and make it secure. To do this:
- click on the Settings tab on Heroku
- under Config Vars, click on Reveal Config Vars
- enter your username and password details